In the original Morbus, maps often implemented a light switch or generator which would turn off some or all of the lights in the map. In this S&Box iteration I wanted there to be the tools for a lot more control over lights, or more importantly, what powers lights.
This might mean more than a simple generator with an on/off switch. Perhaps there are relays or circuits which can be broken for specific parts of the map instead of the whole map. I wanted a flexible system that was also fairly simple.
In this post we’ll be exploring what this system looks like from an architectural and technical perspective, followed by how this looks in game right now.
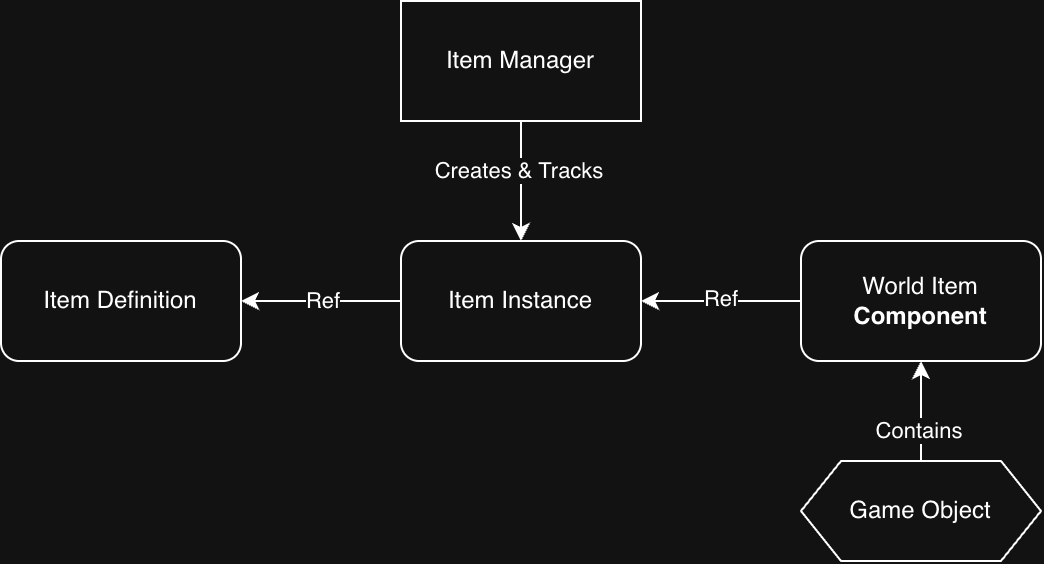
Component Architecture
Let’s first look at relations;
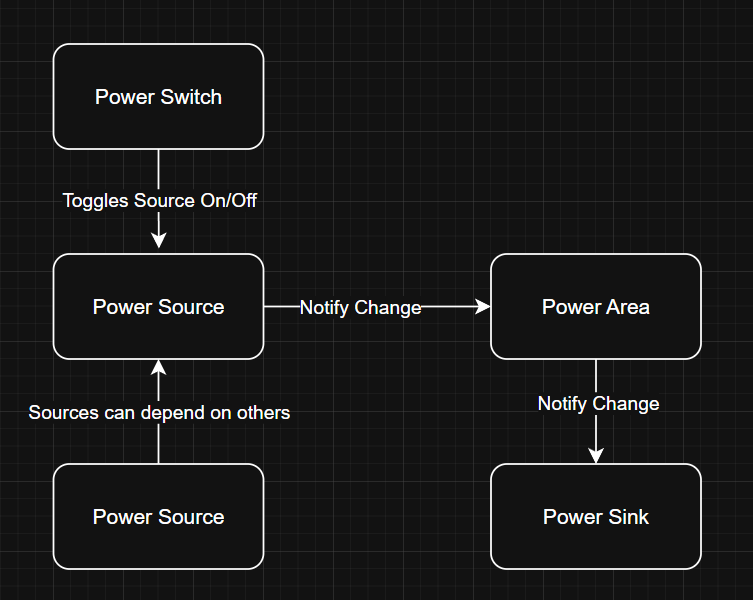
Power Source
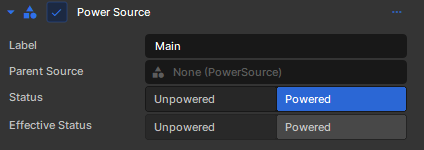
A power source provides power.
A power source could have a “parent” power source, if this is the case, the power source is more like a pipe instead of a generator of power; if the parent power source is off, then the child cannot provide power.
The label is just a friendly name for us.
The status is the power source itself, whether it’s on (powered) or off (unpowered.)
The effective status takes into account the parent power source as well.
Power Sink
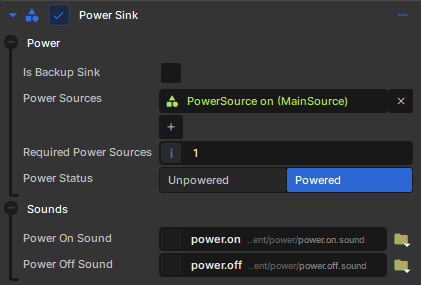
A power sink uses power provided by a power source.
A power sink could have multiple sources, and it may need more than one source to be powered. If it has enough sources that are powered, then it too is powered.
A backup sink just means it’s status is inverted. So if the power source is unpowered and we’re a backup sink, then we are powered (think emergency power or backup power.)
This backup idea could’ve been implemented as a “backup power source” that gets activated when another power source is activated, but that would be more complicated I think.
Power Area
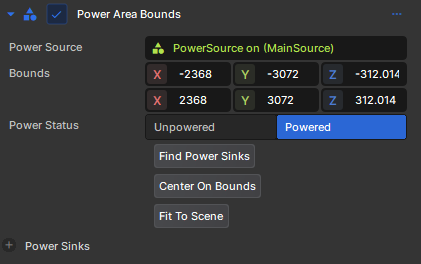
A power area is a representation of an area that a power source affects. Think of it as a big box, and any power sink inside of this box will be affected by the power source.
This also acts as the sort of messenger between power sources and power sinks. I kind of imagine a power area as invisible wiring between a power source and a sink, so it makes sense to have it be the messenger.
Power Switch
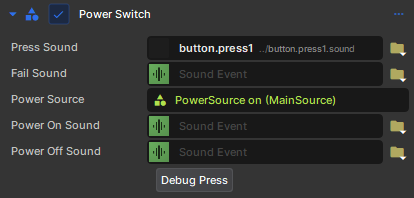
Something needs to turn a power source on/off, this is that.
Players can interact with it and press it, thus toggling a power source.
Okay so what about lights?
Lights would be considered a power sink, and I needed something that would translate a power sink changing status (powered <-> unpowered) to light components being enabled/disabled.
I could’ve solved this translation as a separate component, but instead I decided to make it a derived component called LightFixture.
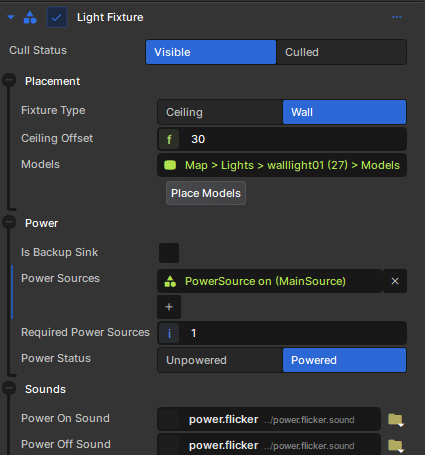
Under the hood this LightFixture component will find any child Light components and then enable/disable them based on the power status.
Cull Status?
It seems like S&Box performance is greatly lacking when it comes to automatically culling lights and geometry that aren’t visible. This is very frustrating since you’d figure this would exist by now. To try to improve performance I built a system that would cull lights if I think they aren’t visible to the player.
I accomplish this by setting up my map with these MapAreaBounds components, which are bounding boxes of specific rooms and sections of lights
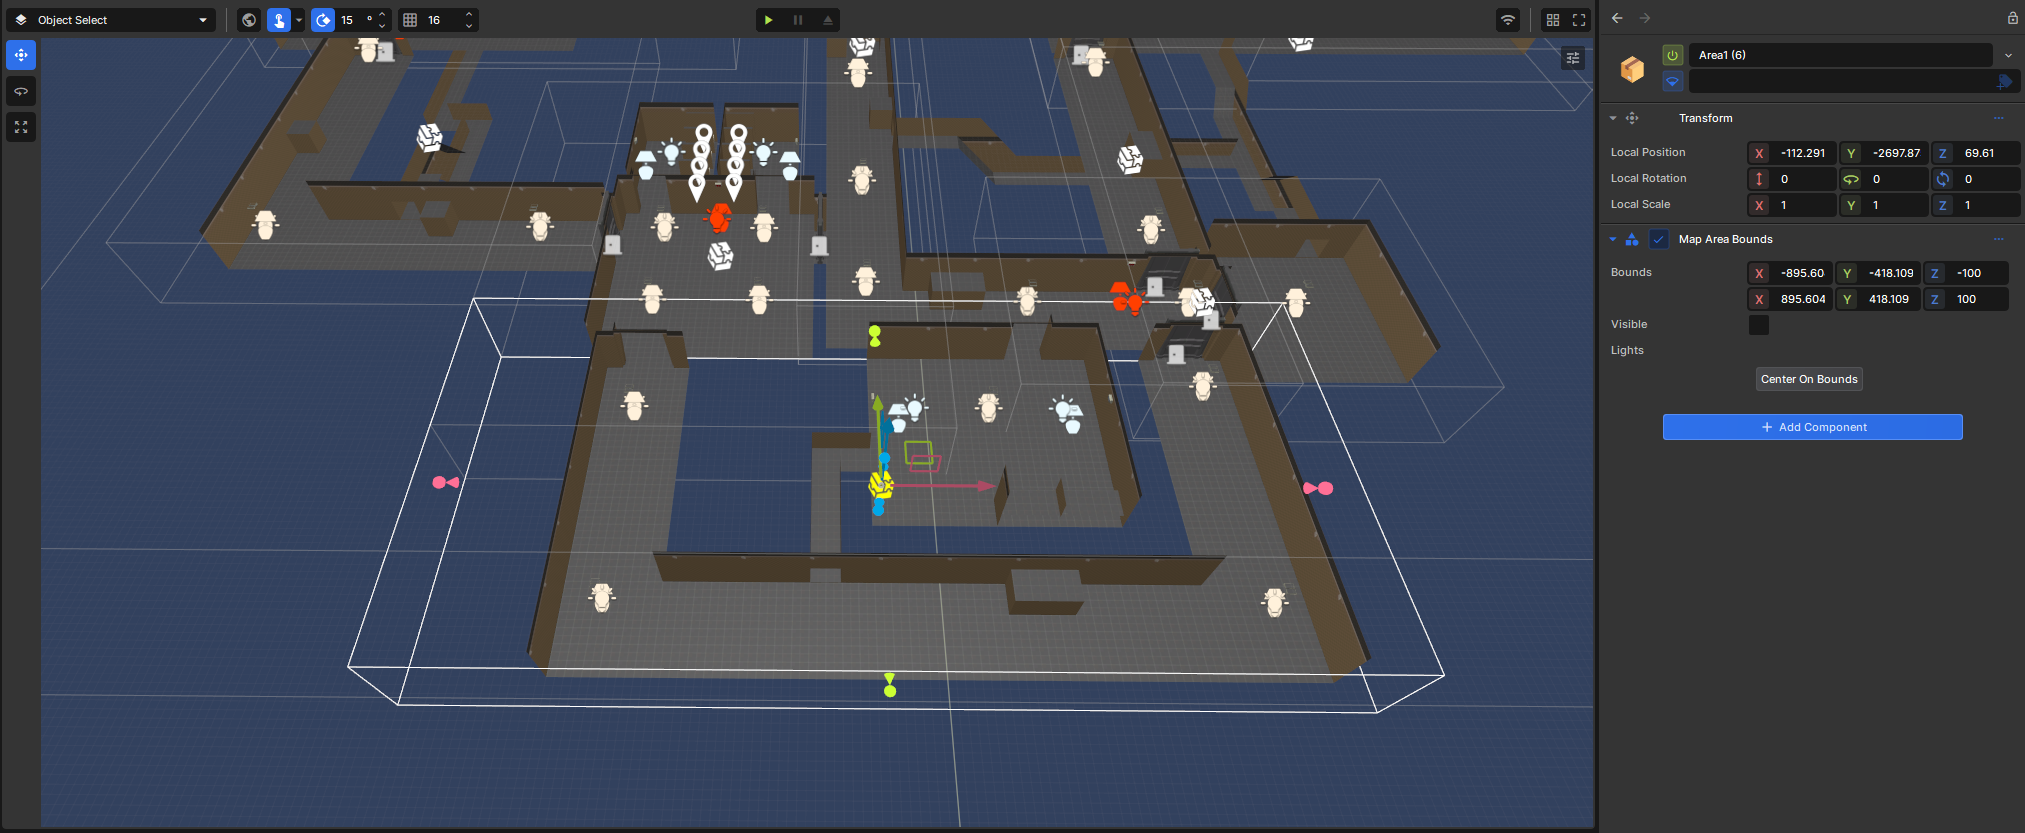
Then every frame I look to see where the player’s camera is aiming. I cast a trace along their aim and see if I will intercept one of these bounding boxes. No collision is used, but since I can figure that in this map the player will never see more than 5000 units in a direction (due to walls and doors) I only trace 5000 units ahead.
If this trace intercepts a box, then I know that the lights in that area are necessary.
You can see this system working in this video:
I could’ve possibly used an angle based approach for this, and I might revisit this later. What I really hope is Facepunch builds something into the engine to handle this.
Placement?
Placing stuff manually in an environment kinda sucks. I want to click a button and have my ceiling light automatically placed on the ceiling, or have it placed on a wall a certain number of units from the ceiling.
This placement section is just tools for me in the editor, I can click a button and it figures out the appropriate place to put the light. The models themselves are child objects so this is easy to do.
You can see in this video I place a ceiling light, hit a button and it snaps to the ceiling.
Or with the wall light it casts a series of traces to find the closest wall and then positions the light on the wall for me.
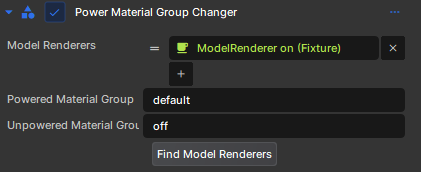
Material Groups
Light models also need to change material group based on their on/off status. Any decently created light model will have a material for the “on” state that has self illumination to make it look lit up.
This i created as a separate component to test out the modularity of the system.
I’ll have to see if making an uber derived component or a multiple smaller modular components that interact and respond via events is the better way to go in the long run. Though I suspect smaller modular components will be the best.
The demo
Okay you’ve survived the technical stuff, or maybe you skipped past it, let’s see how this all looks in game right now
We can see I press a button, which causes the main lights to turn off and a red emergency light turns on. There’s a power down sound effect that comes from those white generators in the room.
I’ve also tested all of this in a networked setting and it works. We’re one step closer to our first playtest!